Final project discussion, Fabduino.
We are going to put use all the knowledge we gained through the weeks before and try to create a product using fablab facilities ad techniques.
Luciano is going to be our facilitator for this week for this process.
Luciano is product designer by profession and he introduced us to design thinking concepts and process.
We will be designing a product that is going to be such that it can't be
done easily by any other means and is going to fully capitalize on
Searching for perfection spiral process: the prduct that comes out is going to be minimum viable product at first and the idea is to try to perfect it more and more, this is the spiral development of product. We aim a being Capable of doing something rather than gain full mastery in anything. None here would be aiming at becoming a master is mechanical design, fluid dynamics or art. But we can use elements in these fields to build our prduct.
The design thinking process: Here is a way to start a design. We try to answer relevant question to get answer as the criteria for design. Below is one the ways we can do that
Ask, imagine, plan, create improve cycle
Ask- identifying a need, problem statement think of scope.
Imagine : we use brainstorming and divergent thinking to generate ideas. Try to think from different angles, breakdown problem to component problems.
Plan : we think of how to solve. The identified problems or component problems.
Create : involves making the prototype. Improve :involves test and iterations.
Design brief
Design brief is another way that helps designers arrive at an design criteria. We answer the following question in a design brief
What, Who, Why, How and When
What - product description, problem statement. The product I want to design is an ear phone organizer.
-Size-40 to 50 mm
-Material- smooth and easy to handle
-Weight- lesser the better
-Strength - stong enough to take the compressive load when my pant might be pressed against my leg.
-Time - In a weeks time
Who - Who is it for, Age, Gender, etc. The product I am going to design is for myself So I will have to think of only satisfying my needs here.
Why- The purpose is to allow me to store my earphones in my pocket and avoids tangle and damage.
How- 3 printer, laser, Shopbot or molding and casting can be used
When- In a week's time
Solution analysis
We think of solutions that meet the criteria generated from the above exercises to understand the design needs. I locked on to a spool like mechanism that be enclosed and by spinning the spool the earphone wire can be wound.
Risks and benefits - benefit is that this design protects and organizes the earphone and it's small enough to fit into my pocket.
risk- the product I am thinking requires a sliding mechanism, I need to design a very good fabricating way for this mechanism. it might turn out to be a huge task, fine tuning and eating all dimensions right and for it to be
Fabduino
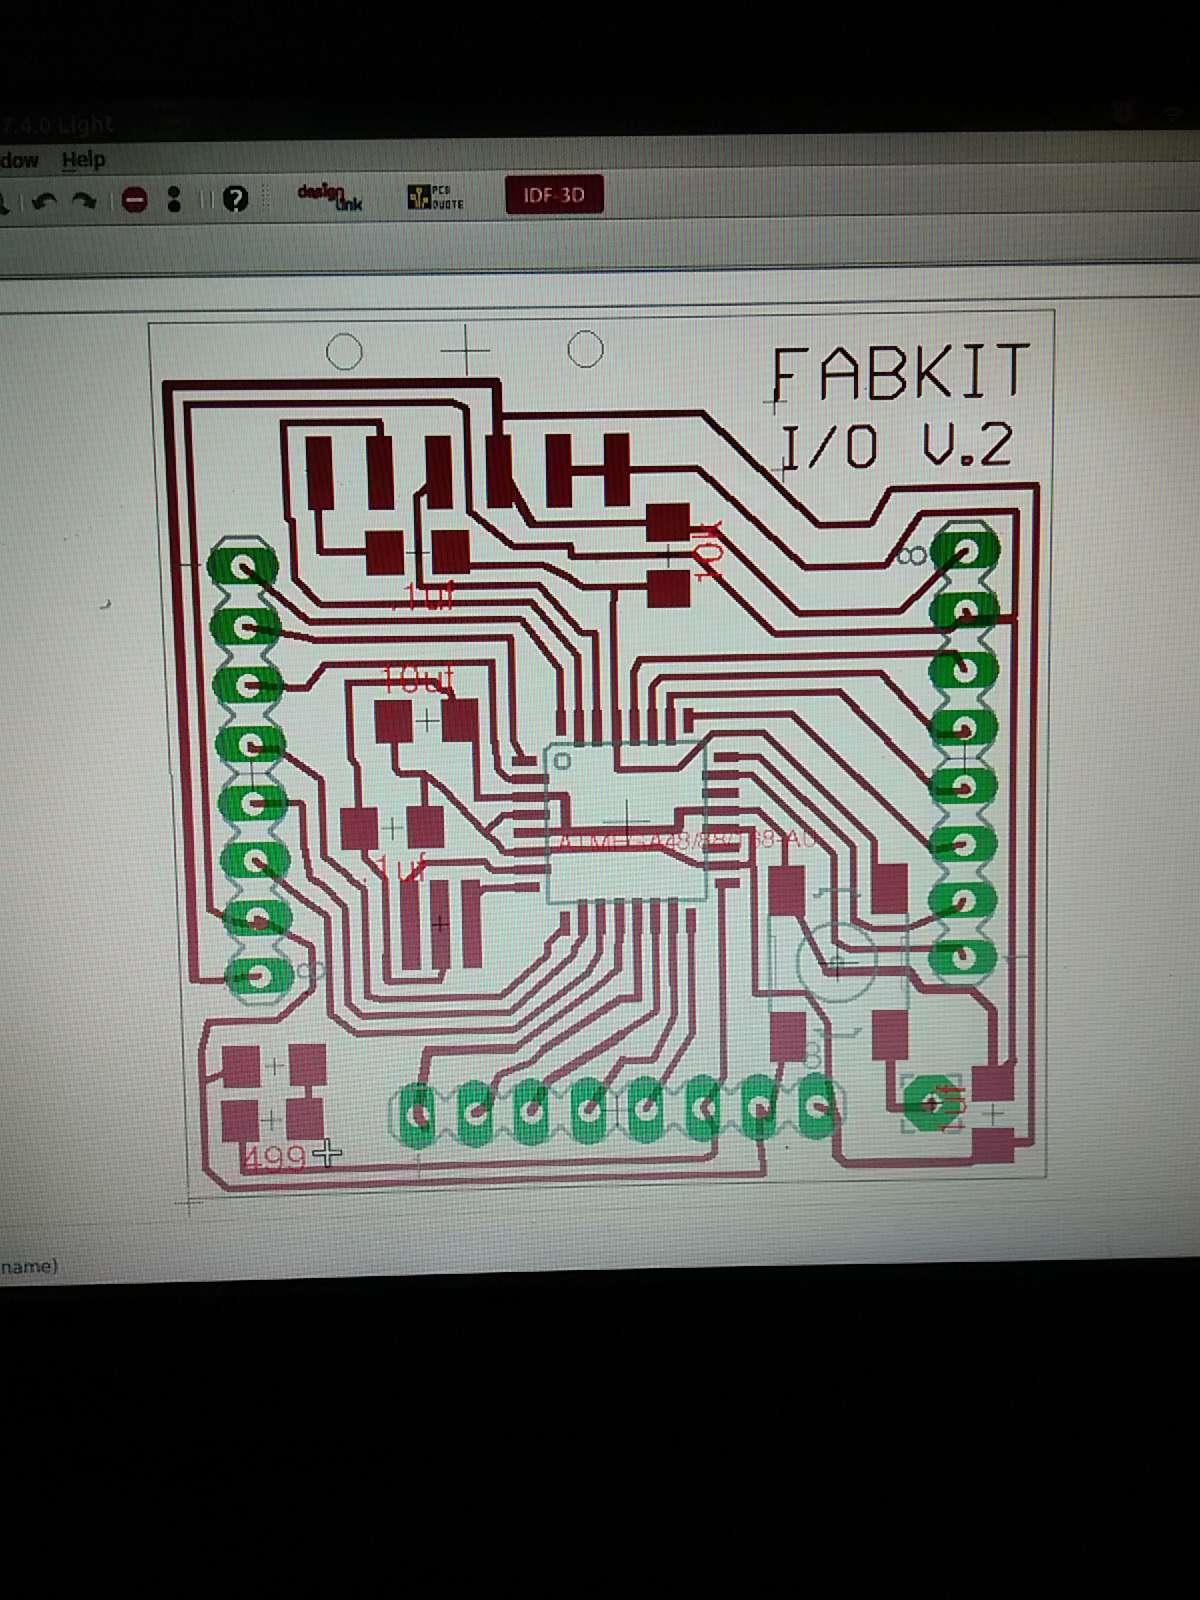
We tried to fabricate a Fabduino. Fabduino consists of atmel controller that can be programmed. It has far more pins, data storage than the attiny controller allowing us more freedom in coding and inputs and outputs. We downloaded the png for fabricating from the following links
fab.cba.mit.edu/content/projects/fabkit/
Soldering atmel microcontroller
What's different : as compared to attiny the atmel microcontroller has more leads and smaller gap between the lead and smaller leads and traces. It also accommodates holes so you'll have to download the holes png also. The png given by the site for holes is an inverted image, make sure you use invert function to set this right While milling. Use 1/32 bit to mill holes, same as outline. And make sure you mill the holes before milling the outline.
How?
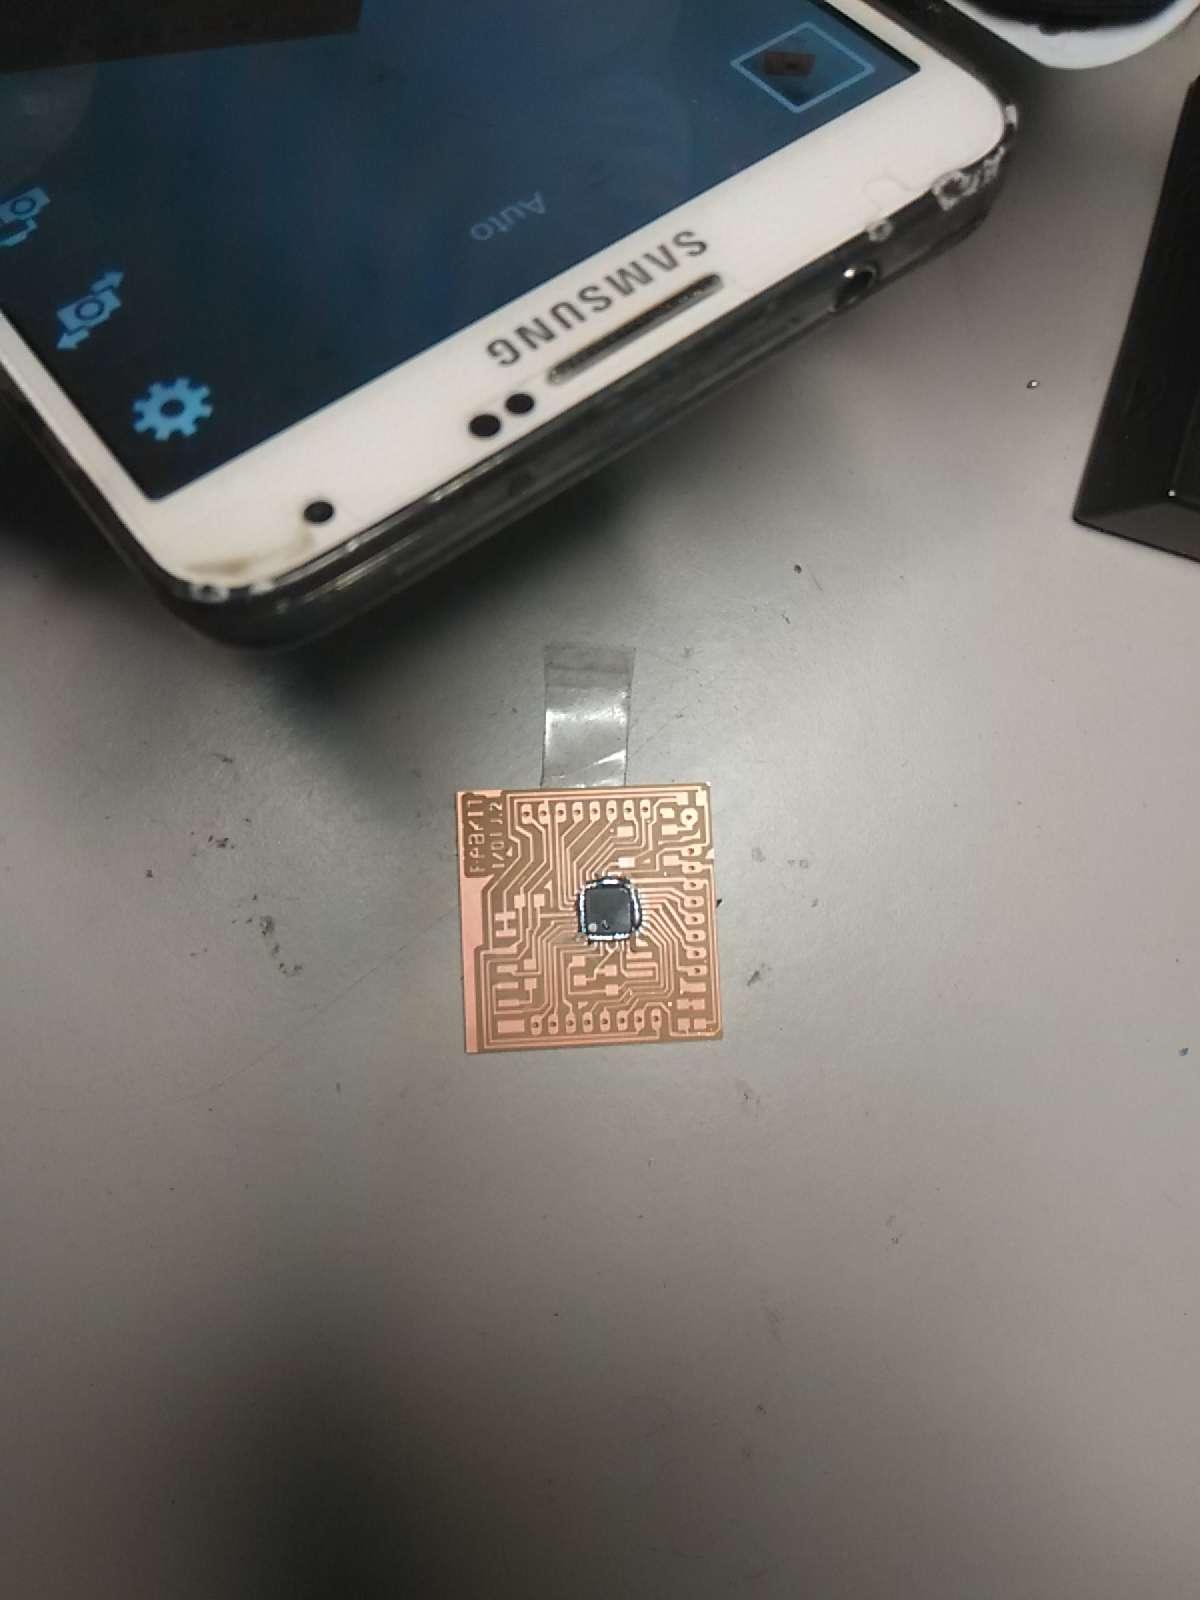
We secure the microcontroller similar to attiny, by soldering two diagonals corners first.
Next instead of trying to solder each and every one to corresponding trace, we solder all pins together into one mass of lead on each of the 4 sides of the microcontroller.
We are going to put use all the knowledge we gained through the weeks before and try to create a product using fablab facilities ad techniques.
Luciano is going to be our facilitator for this week for this process.
Luciano is product designer by profession and he introduced us to design thinking concepts and process.
fablab concept of personal fabrication. I came up with ideas that is going to solve my problems. The ideas were
1. To print a skin to my mouse. My mouse is smaller than what I feel
ideal holding and the scroll button is hard to press on. Since I am a
product designer as well and work with solidworks and softwares as such,
this feature is extremely important to me.
I might drop this idea. I will be design to fix an imperfect design or
try to model it for my need. I wont be doing any new things here and an
easier solution would be to buy a mouse that fits me better. The mouse
itself is easily available.
2. Laptop charger cable lock. My charger has become loose overtime and
the press fit locking provided by the plug itself has worn out and it
comes of easily. I want to create a product that allows me to lock the
plug in place as long as I need it.
Again since here I'm trying to fix a design issue on already existing
design Luciano suggested this might not be great to work on for my
project.
3. Ear phone organizer- I want to design an ear phone organizer in order
to avoid tangle and extend life of my ear phones by protecting against
damage while making it easier to be placed in my pocket.
Although many earphone organiser are available out there they don't meet
my criteria. The ear buds usually hang out of a spool like object and
while placing it in my pocket the ear buds might get hooked to the
fabric and over time get damaged. I dont want a case also because I want
to quickly wind my earphone on a spool and keep it in my pocket. What I
am looking for is spool like things that also protects my earbuds from
getting tangled with the fabric of my pocket.
I chose this product to pursue since I am going to pursue new design criteria and going to start from scratch.
Searching for perfection spiral process: the prduct that comes out is going to be minimum viable product at first and the idea is to try to perfect it more and more, this is the spiral development of product. We aim a being Capable of doing something rather than gain full mastery in anything. None here would be aiming at becoming a master is mechanical design, fluid dynamics or art. But we can use elements in these fields to build our prduct.
The design thinking process: Here is a way to start a design. We try to answer relevant question to get answer as the criteria for design. Below is one the ways we can do that
Ask, imagine, plan, create improve cycle
Ask- identifying a need, problem statement think of scope.
Imagine : we use brainstorming and divergent thinking to generate ideas. Try to think from different angles, breakdown problem to component problems.
Plan : we think of how to solve. The identified problems or component problems.
Create : involves making the prototype. Improve :involves test and iterations.
After this step we again go to ask, and we try to improve definition of the
problem through experience of prototyping and continue the cycle till we
reach desired product.
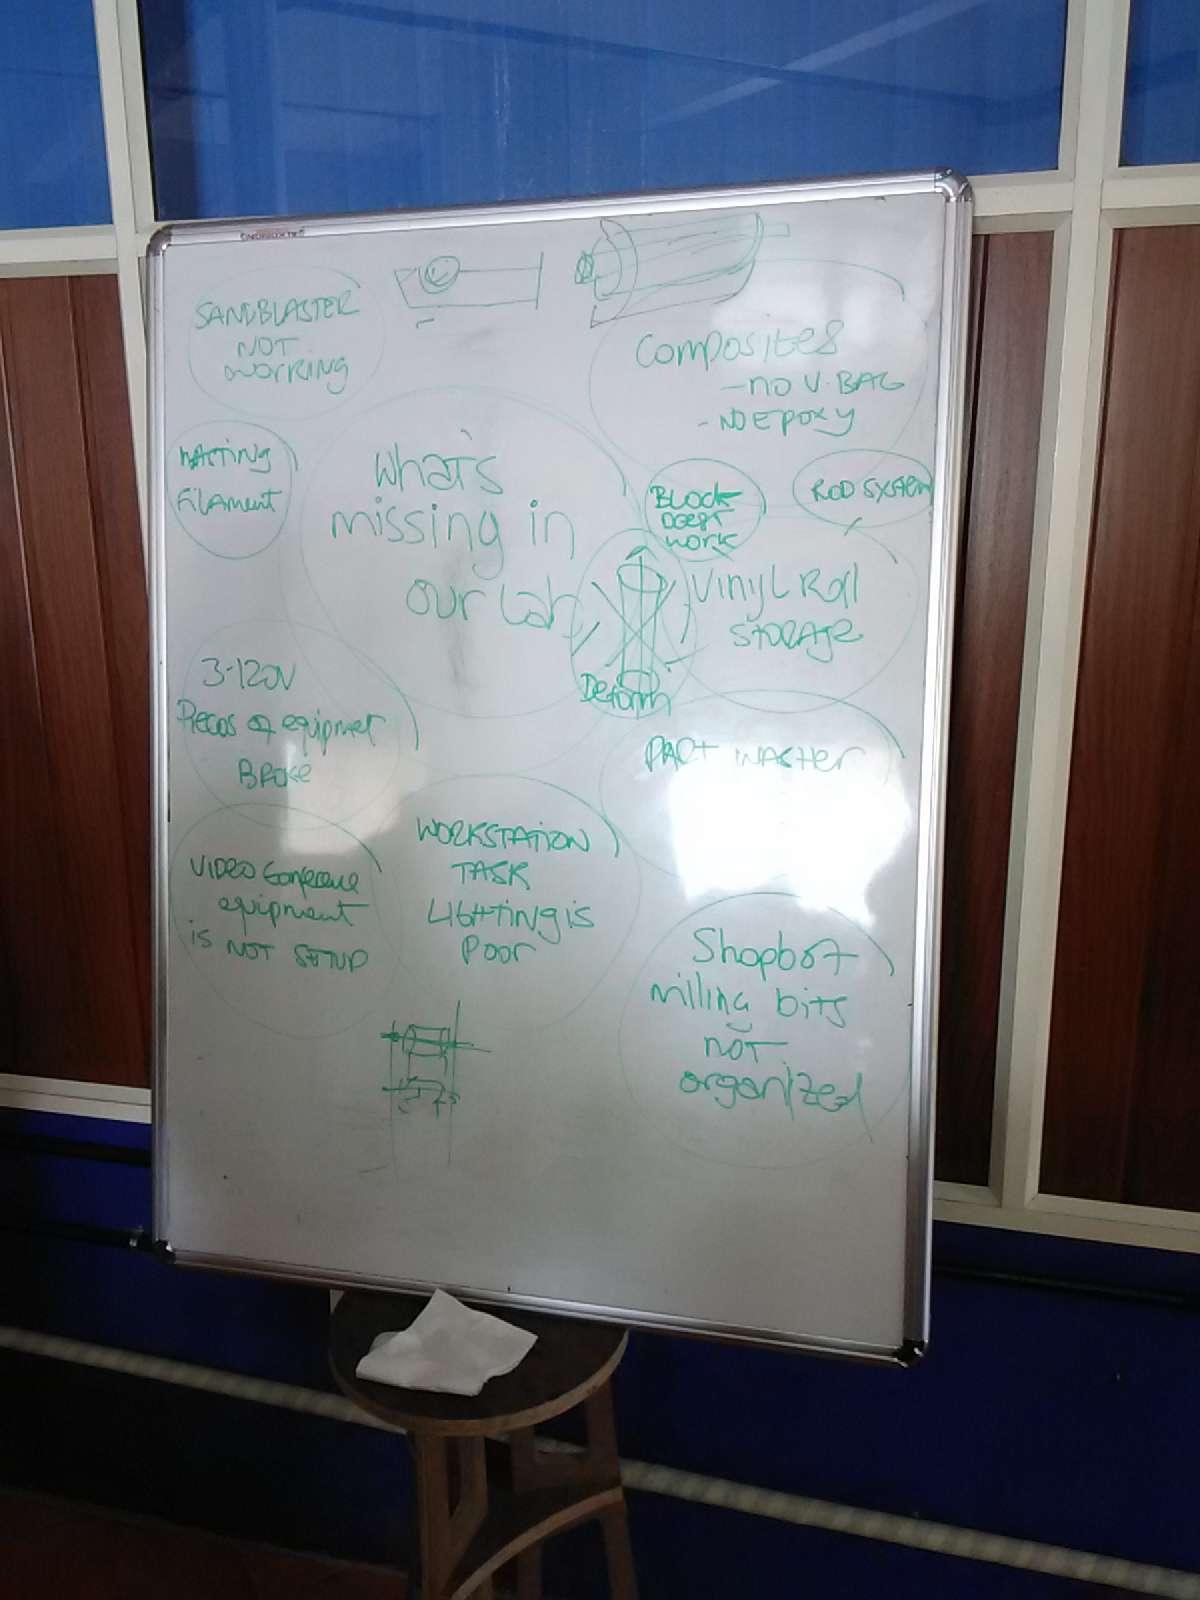
We listed down the things our lab needs as an exercise to brainstorm. We discussed shortly over each problem.
Design brief
Design brief is another way that helps designers arrive at an design criteria. We answer the following question in a design brief
What, Who, Why, How and When
What - product description, problem statement. The product I want to design is an ear phone organizer.
-Size-40 to 50 mm
-Material- smooth and easy to handle
-Weight- lesser the better
-Strength - stong enough to take the compressive load when my pant might be pressed against my leg.
-Time - In a weeks time
Who - Who is it for, Age, Gender, etc. The product I am going to design is for myself So I will have to think of only satisfying my needs here.
Why- The purpose is to allow me to store my earphones in my pocket and avoids tangle and damage.
How- 3 printer, laser, Shopbot or molding and casting can be used
When- In a week's time
Solution analysis
We think of solutions that meet the criteria generated from the above exercises to understand the design needs. I locked on to a spool like mechanism that be enclosed and by spinning the spool the earphone wire can be wound.
Risks and benefits - benefit is that this design protects and organizes the earphone and it's small enough to fit into my pocket.
risk- the product I am thinking requires a sliding mechanism, I need to design a very good fabricating way for this mechanism. it might turn out to be a huge task, fine tuning and eating all dimensions right and for it to be
Fabduino
We tried to fabricate a Fabduino. Fabduino consists of atmel controller that can be programmed. It has far more pins, data storage than the attiny controller allowing us more freedom in coding and inputs and outputs. We downloaded the png for fabricating from the following links
What's different : as compared to attiny the atmel microcontroller has more leads and smaller gap between the lead and smaller leads and traces. It also accommodates holes so you'll have to download the holes png also. The png given by the site for holes is an inverted image, make sure you use invert function to set this right While milling. Use 1/32 bit to mill holes, same as outline. And make sure you mill the holes before milling the outline.
How?
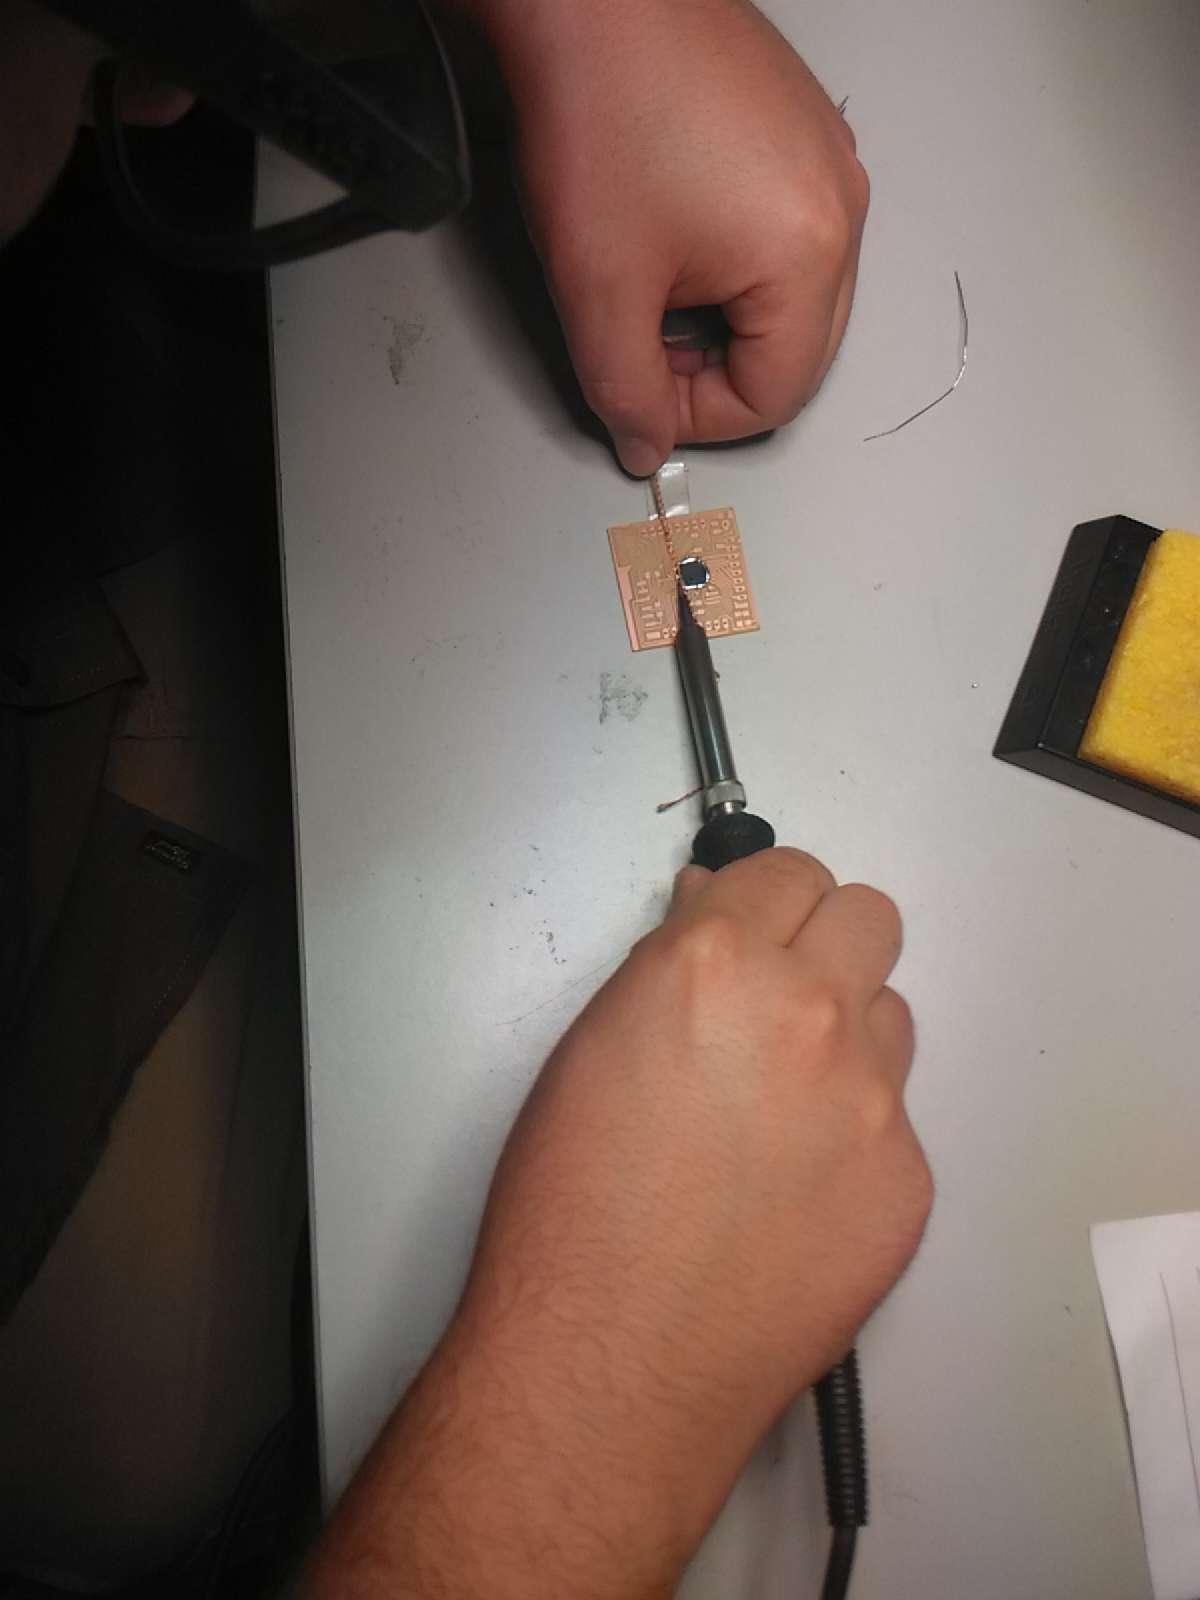
We secure the microcontroller similar to attiny, by soldering two diagonals corners first.
Next instead of trying to solder each and every one to corresponding trace, we solder all pins together into one mass of lead on each of the 4 sides of the microcontroller.
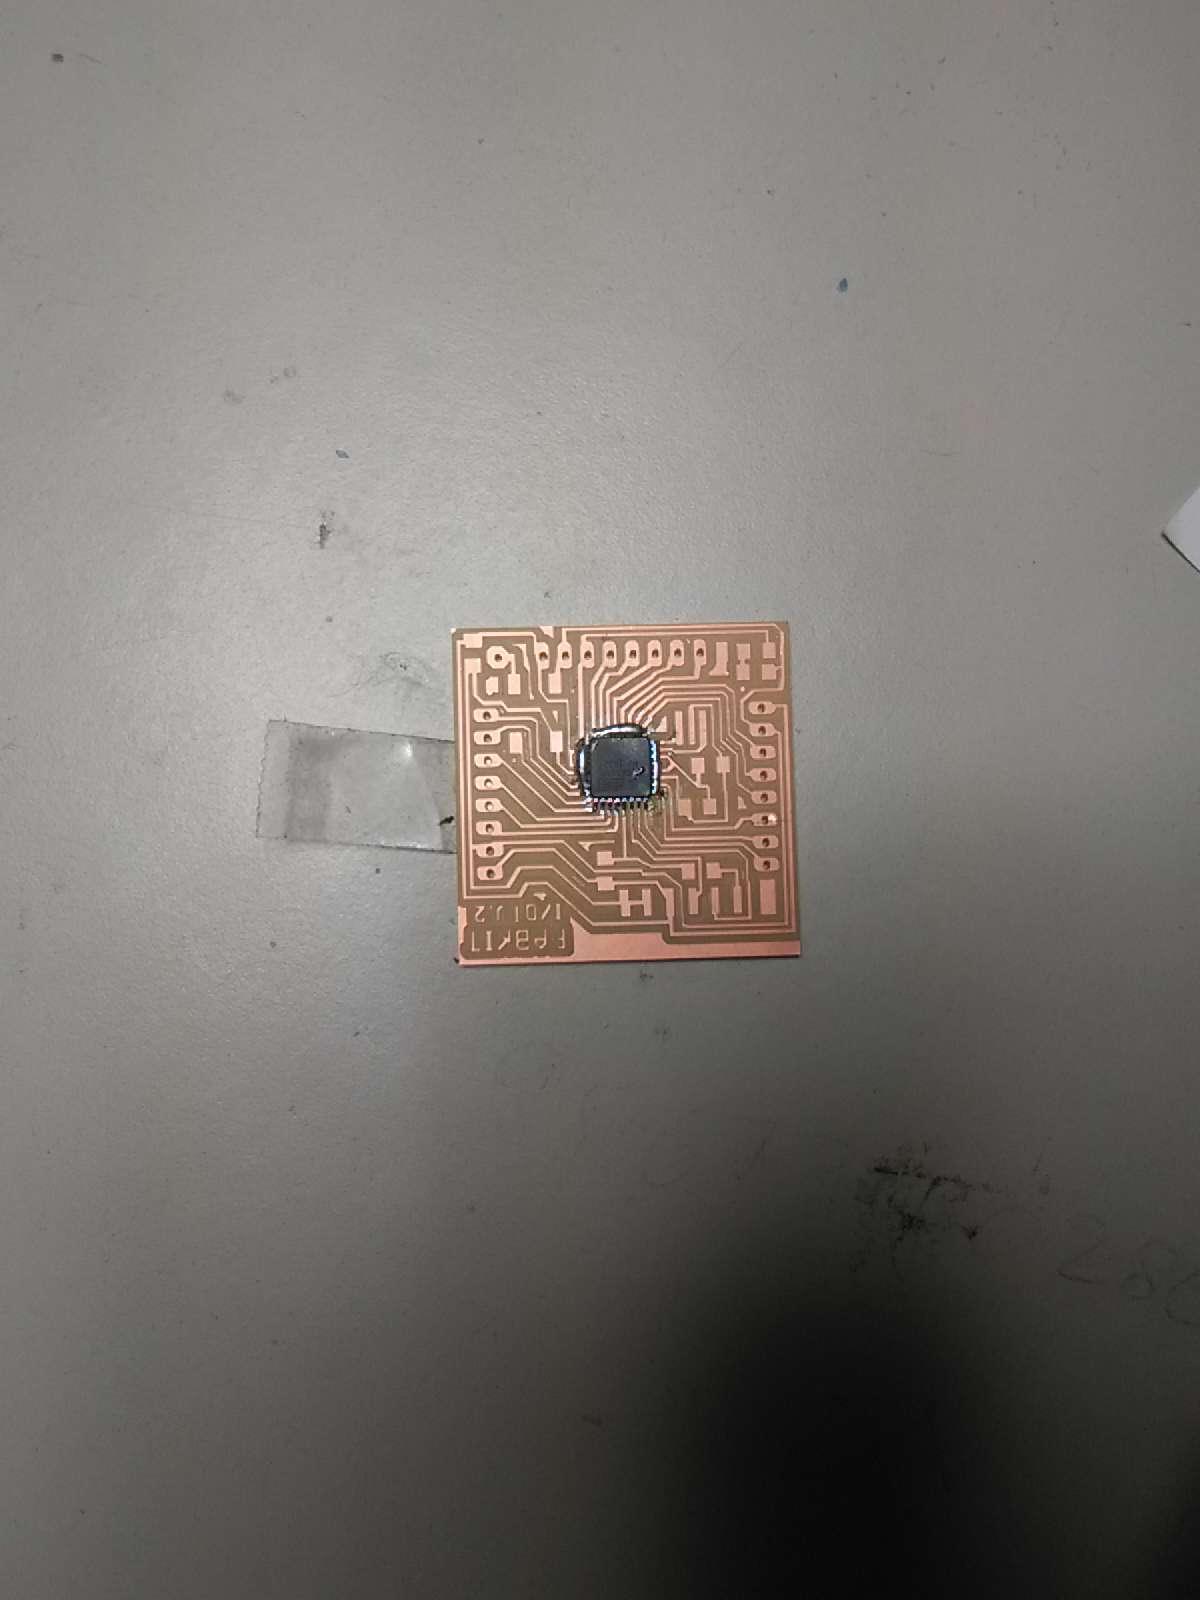
All the pins are short now but we will remove all the mess at once using a copper braid.
On the bottom side of the microcontroller you can see that all mess has been removed and a clean soldering is achieved.
We had to get the component list and positions using eagle brd file using eagle software.